Man has been making fermented flour and water and baking it into bread since the dawn of human civilization. The making of fermented sourdough bread has progressed as far as researchers have known.
To Make a good fermented sourdough bread it is very important to understand the different processes that the bread will go through and planning according to the result we want to reach. The understanding of the steps and making sure we have the ingredients, accessories are critical for getting a good result.
For beginner bakers it is recommended:
- Start with simple, uncomplicated loaves of bread, based on bread flour and without special toppings.
- Weigh the ingredients accurately. This is important for getting good results.
- Follow the recipe instructions.
- perform the same recipe a couple of times, and when you feel you control the technic, only then try leveling up to a more advanced recipe of fermented bread, Sourdough.
- Use 100% good quality whole wheat flour.
Sourdough bread is something you learn by doing. Beginner bakers are not advised to change recipes at all but to focus on making one recipe. Only after you feel that the recipe is well done again and again and you are getting good loaves of bread, change only one thing and no more, to understand how the change will affect the bread and only then move forward.
You should remember that all bakers fail all the time, it’s part of the learning process. Baking long-fermented sourdough is a learned process that is constantly changing and experience, knowledge is more important in it than the recipe itself.
Leaven preparation
Sourdough leaven is perhaps the oldest method of puffing dough. It is a fermented mixture of water, flour, and the microscopic yeasts which are present in the air.
leaven is divided into two main styles – dry (50-80% hydration) and wet (90-110% hydration), the difference between them is the level of hydration (the ratio of water to flour – in percent). The dry residue is also the method I’m going to review here.
The process for creating the sourdough starter is a bit long, but in the end, you get a sourdough starter that contributes to the taste of the bread.
It is easiest to start a leaven with whole wheat flour. It is recommended to store the leaven in a clear glass or plastic jar so you can see the development of the leaven. Make sure to use the right size jar, leaven can sometimes swell up to 2 or 3 times its original volume.
Preparation of leaven recipe
The best way to create a leaven is to get a piece of leaven from a friend who bakes Sourdough bread too. This way you can gain strong, mature, and deliciously complex leaven.
But if you don’t have a way to get a piece of leaven you can make one at home. You can use this recipe:
So, what do you need?
- 100 g white raisins
- Whole wheat flour
- Honey
- Clean cloth
Day 1
The first thing we need to do is to prepare “raisin water”. We soak for half an hour the raisins in a glass of warm water. After half an hour strain the keep the “raisin water”.
In a separate bowl, mix half a cup of flour, half a glass of raisin water, and half a teaspoon of honey.
Cover the bowl with a damp cloth and leave at room temperature for about 24 hours.
Day 2
After 2 days you should not see any significant change in the mixture.
Add to the bowl we prepared yesterday another half a cup of flour, 1/3 cup of warm water, and the last half a teaspoon of honey. Mix to a uniform mass
Cover the bowl with a damp cloth and leave in room temperature for another 24 hours.
Day 3
At this stage should start to appear small bubbles on the surface of the dough, and the smell should be a little sour.
Add to the bowl 1 cup flour, 1/2 cup water, and mix until smooth and cover the bowl with a damp cloth and leave at room temperature for another 24 hours.
Day 4
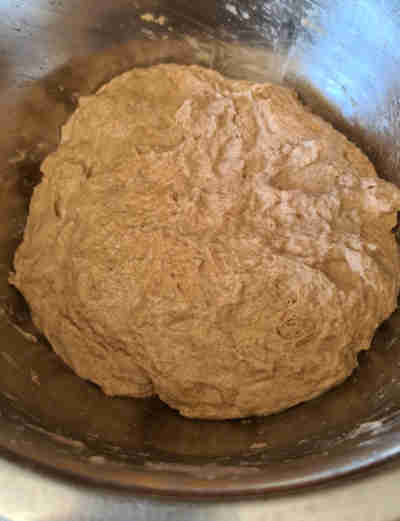
Now after 4 days, the dough will look bubbly, and many bubbles will cover most of the surface and the smell will be of a delicate sourness.
Today is a bit of a different process, you mix the dough, divide it into half. One-half throw and with the other you proceed with the process.
Add the remaining dough 1/2 a glasses of water, 1 cup of flour. Mix to a uniform mass. Cover the bowl with a damp cloth and leave it at room temperature for another 24 hours.
Day 5
We are almost at the end of this process; the dough will look very bubbly with a strong sour smell.
Mix the dough and add 1 cups flour and 1/2 cup of water. Mix again to a uniform dough.
Cover the bowl with a damp cloth and leave it at room temperature for another 12- 24 hours. Keep an eye on the dough, when the dough looks very bubbly again, transfer to an airtight container and place in the refrigerator.
Day 6
On the 6th day, sourdough bread can be made. I recommend before using the sourdough starter to take it out of the refrigerator and leave on the counter for an hour or two until it reaches room temperature.
Fermented Sourdough Bread Recipe
And now, after you know everything there is to know about the making of your leaven, let’s start with the fermented sourdough bread recipe.
Ingredient:
- 330gr Coldwater
- 250gr Good quality Whole-wheat flour
- 250gr Whole spelled flour
- 100gr leaven
- 11gr Salt
1 – Mixing and Autolysis
The first stage is mixing the water the flour in a bowl, cover the bowl for half an hour with a damp towel for autolysis.
The main idea in this stage is that after combining the flour and water into an initial mass (without salt and leaven), we will stop mixing the mass for a period of between half an hour and several hours to allow the flour to absorb the water, opening and starting chemical and biological processes in the dough.
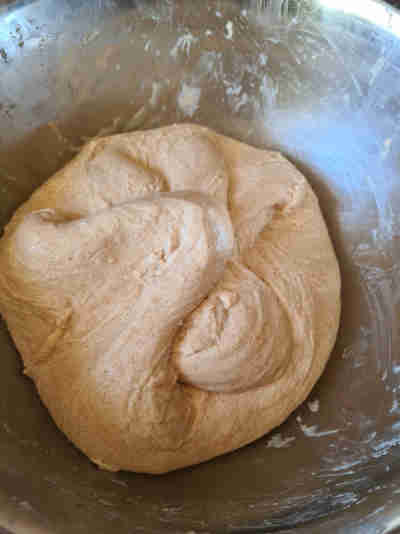
2 – Kneading and Folding
Now we add the salt and the leaven, and start kneading the dough for about 2 minutes.

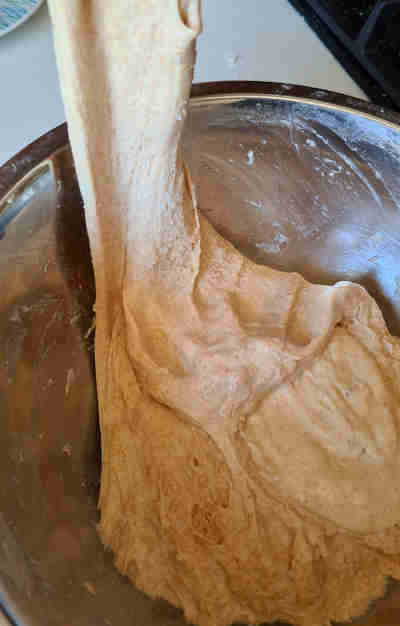
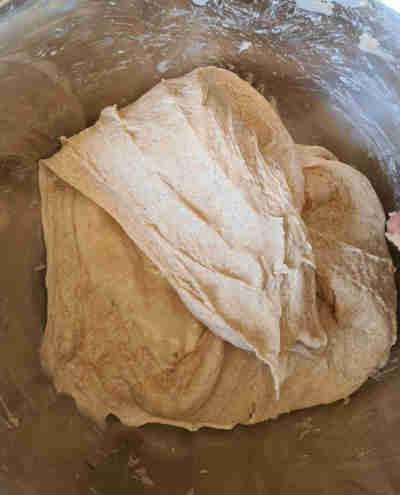
3 – Stretching and folding
Transfer to a wide bowl the dough and stretch and fold every 30 minutes for two hours. I recommend wet with a little water the folding hand before folding the dough to reduce the sticking of the dough near
Between each round, we will cover the bowl well with a damp towel to prevent the dough from drying out.
After two hours we will put the dough covered with a damp towel overnight in the refrigerator.
Stretching and folding is a technique that releases gases throughout the dough and can increase the “strength” of the dough. Usually, the technique makes it possible to shorten the kneading time and especially in “wet” doughs, and increase their strength.
4 – Designing
After fermenting in the refrigerator, this is the stage to take care of the future loaves of bread. Tear a piece of dough from the dough and transfer it to your leaven bowl for “feeding”.
Now we will make an initial design without removing gases from the dough, wait 30 minutes, perform a final design very gently so as not to remove the gases, and transfer the dough to floured puffing baskets.
5 – Puffing
Leave the puffing baskets to rise for an hour on the counter and then refrigerate for 12 to 24 hours. Then we will take the dough out of the fridge, and check for leavening.
You can alternatively swell for about three hours on the counter.
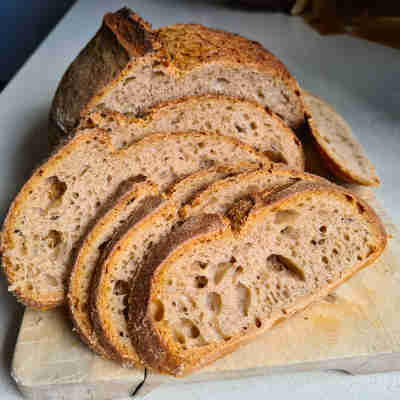
6 – Baking
5 minutes before baking, put in a preheated oven at 230 degrees, a small pan with a glass of boiling water. Place baking paper over the baskets and gently turn the baskets over the pizza peel and release the dough from the baskets.
Bake the bread for 20 minutes on a baking stone / inverted baking tray. After 20 minutes, remove the pan with the water quickly and continue baking at 210 degrees for 25-30 minutes. In the last 10 minutes, opened the oven door to dry the oven and strengthen the crust.
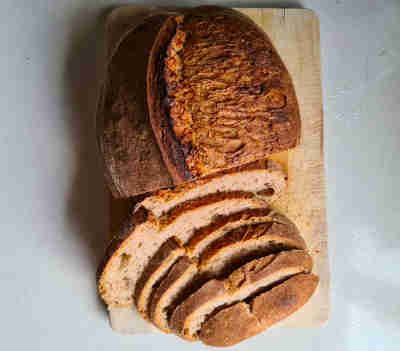
Fermented sourdough bread must be completely cooled before cutting.
If you enjoyed this recipe, you might like these too:
This site is a participant in the Amazon Services LLC Associates Program and contains affiliate links to products. We may receive a commission for purchases made through these links.